Create a new Embedded Automation
Install the Wranggle browser extension if you haven't already.
Create a new, embedded automation
An embedded automation is written inside Wranggle's popup window using a Cloud9 embedded editor, with your source code stored in local browser storage. You normally won't use the embedded editor much, its functionality is fairly limited, but it doesn't require any setup and is convenient for small automations.
In the Wranggle popup, select the Embedded Automation Editor then click the plus button to add a new automation.
You'll see something like this:
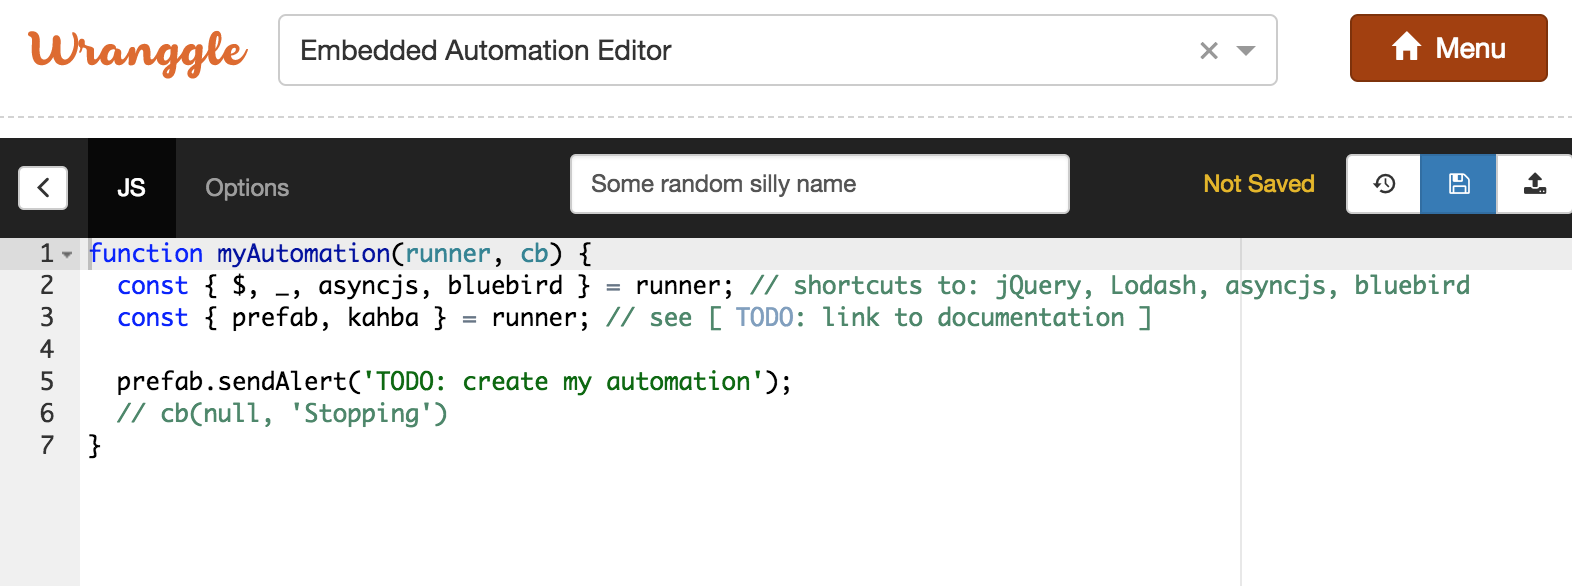
You'll probably want to replace the default name (near the top of the popup) with a better name.
Add some functionality
On HN, user comments containing links are often relatively high-quality posts. Let's add a button that toggles post visibility so it's easy to skim just those comments.
Make sure the "JS" tab is selected in the Embedded Automation editor, and add this to your script:
const $commentsWithoutLinks = $('.comment:visible > span:not(:has(a[rel=nofollow]))').closest('tr.comtr');
// ^^^ your script is passed a reference to jQuery and other popular libraries

prefab.mainMenu.addButton('Toggle Comments Without Links', () => $commentsWithoutLinks.toggle());
In the embedded automation editor toolbar, click the save button.
Run your script
Before running your script, first visit Hacker News in your browser and click through to a Comments page. (Later in this tutorial we'll handle the non-discussion-page case more gracefully.)
Return to the Wranggle popup. You'll see the embedded automation editor is as you left it. In the toolbar, click the run button.
Try out your new automation! Your toggle button will look like the greenish one here:
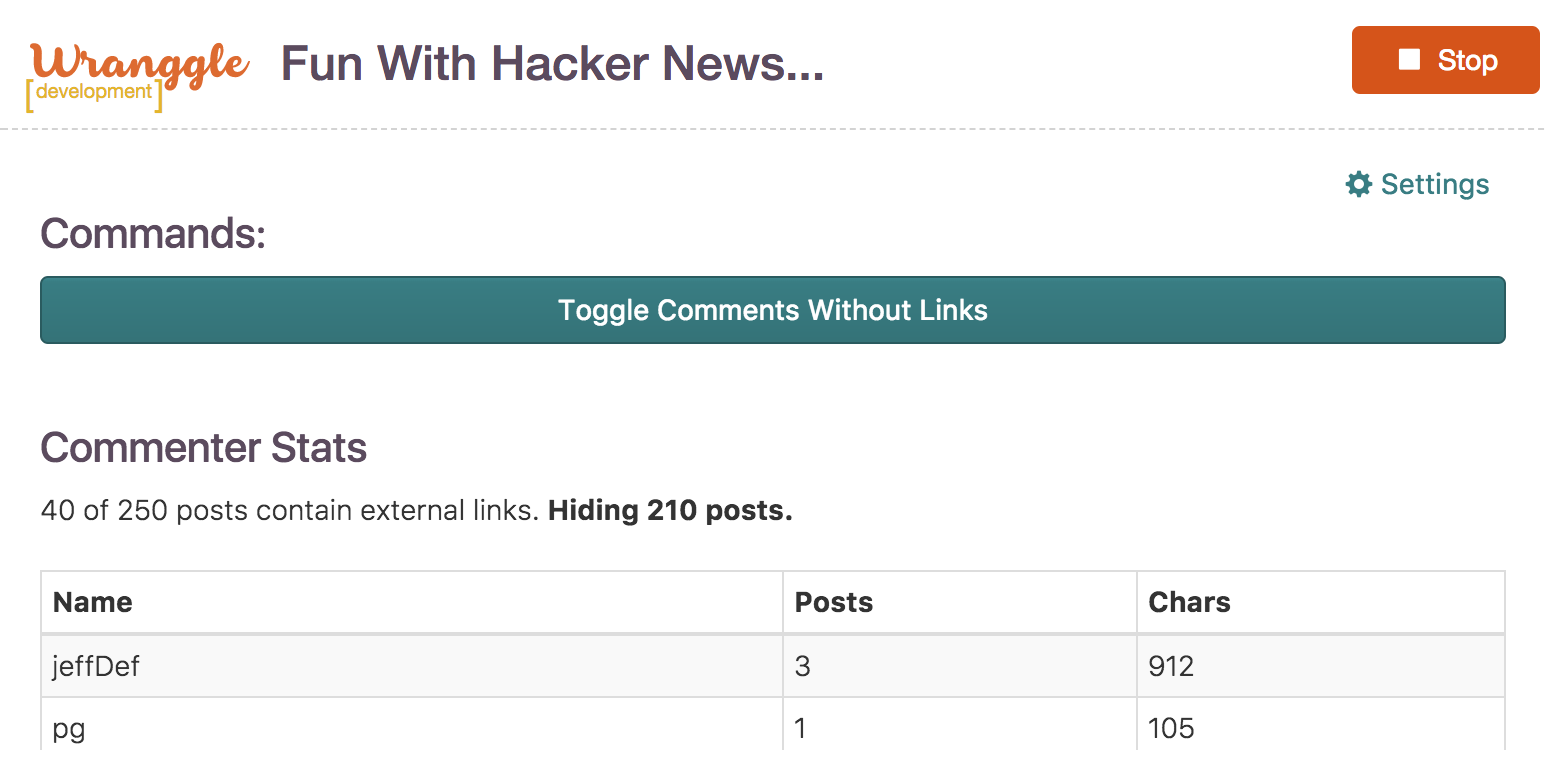
You'll notice the above screenshot has more visible than what's on your screen — we'll add those components next.
To return to the editor, look for the Edit Embedded Automation shortcut link under the primary Stop/Start button in the Wranggle popup.
Automations only run in the tab in which they were started.
After the user starts your automation, it will run in that single tab until: 1) the user clicks Stop; 2) the user closes
the browser tab; 3) the script session expires; or 4) your script declares itself finished using the passed-in callback.
Using Prefab components
To support our next feature, we'll first add a little helper function that gathers information from the current HN discussion page, counting the number of posts made by each person.
Helper function for gathering data
This _commenterStats function uses jQuery and Lodash to gather information from the page, it doesn't use any Wranggle-related APIs — the only thing worth mentioning is its return signature, a data object for each user, intentionally formatted in one of the ways prefab.reportTable accepts tabular data. Eg:
[ { username: 'someuser', posts: 3, chars: 1285 } ]
Add _commenterStats to your automation script, near the bottom:
function _commenterStats(maxItems=10) {
 const stats = {};
 $('a.hnuser:visible').each((i, el) => {
   const $el = $(el);
   const username = $el.text();
   stats[username] = stats[username] || { name: username, posts: 0, chars: 0 };
   stats[username].posts += 1;
   stats[username].chars += $el.closest('td').text().length;
 });
 return _.orderBy(Object.values(stats), [ 'posts', 'chars' ], [ 'desc', 'desc' ]).slice(0, maxItems);
}
Reports
The Prefab API helps you display static information to the user, for tables, text, and custom html.
We'll use prefab.reportTable to show our _commenterStats summary to the user. The reportTable method accepts data in a few different formats, including what our helper function returns: an array where each object represents a row of data, and each attribute key is used as the default column header.
We'll also want to update our existing button, so that it updates the table when clicked.
In your script, replace the line starting prefab.mainMenu.addButton with:
const updateUi = () => prefab.reportTable(_commenterStats(8), { segmentId: 'commenterStatistics', title: 'Commenter Stats' });
// ^^^ by explicitly setting the "segmentId" option, an update will replace any existing report segment, rather than appending a new segment

prefab.mainMenu.addButton('Toggle Comments Without Links', () => {
  $commentsWithoutLinks.toggle();
  updateUi();
});
updateUi();
When you run your automation, you'll now have that zebra-striped report showing the results of the _commenterStats function:
Using your own IDE
If switching between edit and run in the popup gets too frustrating, feel free to switch to the automation-builder server
(covered in the dev server tutorial.)
Persisted user settings
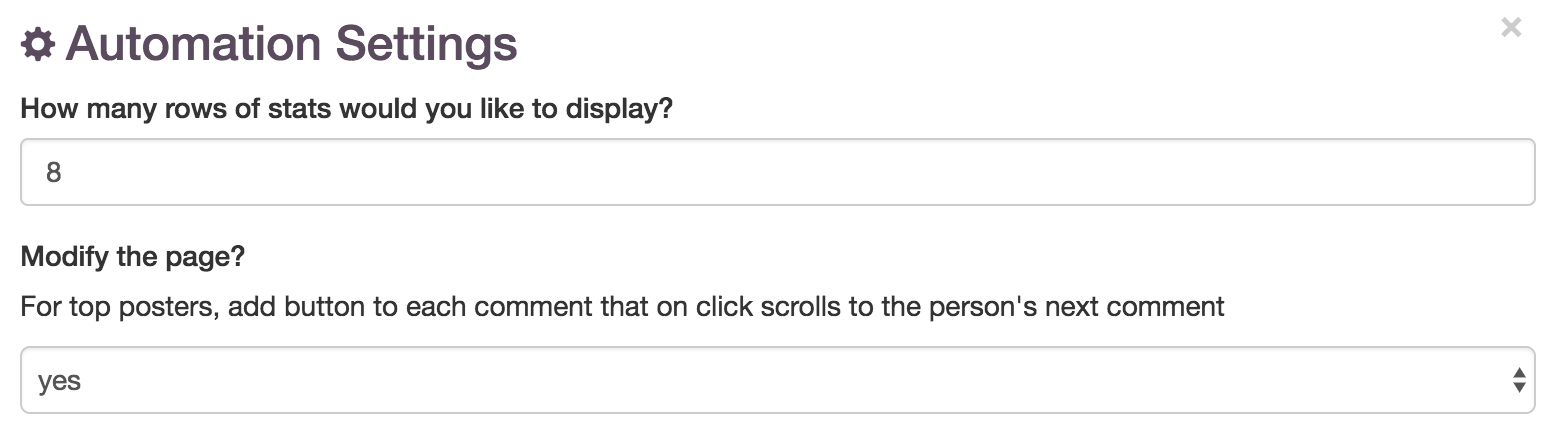
You may have noticed a Settings button in the above screenshot. It becomes visible to the user as soon as you add a field to prefab.userSettings. Prefab's userSettings offers a simple form-builder with its data persisted in durable storage.
Let's add some fields now. In your automation script, add:
prefab.userSettings.addInput('How many rows of stats would you like to display?', {
  name: 'maxRows',
  default: 8
});

prefab.userSettings.addSelect('Modify the page?', [ 'yes', 'no' ], {
  name: 'modifyDom',
  description: "For top posters, add button to each comment that on click scrolls to the person's next comment",
  default: 'yes'
});
Clicking on Settings will now show:
As of Developer Preview 1, encrypted storage is not available. Until it is, please avoid storing passwords and sensitive data.
Let's wire up these settings in the automation script. We'll also add an inline button that on click, scrolls to the poster's next comment — user interactions are not restricted to the popup.
Modify the updateUi function so it acts on our new fields:
function updateUi() {
  prefab.userSettings.snapshot().then(userSettings => {
    // ^^^ userSettings.snapshot is asynchronous. You can either use its promise as we do here, or pass it a node-style (err, result) callback

    const stats = _commenterStats(userSettings.maxRows || 8);
    prefab.reportTable(stats, { segmentId: 'commenterStatistics' });
    _doSomethingWithTheDom(stats, userSettings.modifyDom === 'no');
    console.log(`[Wranggle] Chrome console tip: switch window from "top" to the extension's content frame, so you can use jQuery interactively as you wrestle with tr td tr td tds.`);
  });
}
You'll also need to add the _doSomethingWithTheDom function that it calls. This doesn't use any Wranggle APIs:
function _doSomethingWithTheDom(stats, skipDomModification) {
    $('.inserted-posts-count').remove();
    if (skipDomModification) {
      return;
    }
    const gemStyle = 'padding: 3px 8px; margin: 0 4px 0 6px; color: #ffcb05; background-color: #00274c; border-radius: 2px;';
    stats.forEach((userInfo) => {
      const postCount = userInfo.posts;
      const userPosts = $(`a[href="user?id=${ userInfo.name }"]`);
      $(`<span class="inserted-posts-count" style="${ gemStyle }">${ postCount } comment${ postCount > 1 ? 's' : '' }`)
        .click(evt => {
          const clickedEl = $(evt.target).prev('a')[0];
          const nextEl = userPosts[(_.findIndex(userPosts, (el) => el === clickedEl) + 1) % userPosts.length];
          $('body').animate({ scrollTop: $(nextEl).offset().top });
        })
        .css({ cursor: 'pointer' })
        .insertAfter(userPosts);
    });
  }
If we feel like being thorough, we can add an event listener so our automation script calls updateUi immediately after the user
changes their settings, rather than waiting for the next page load:
runner.on(prefab.Event.UserSettingsChanged, updateUi);
Forms, prompts, and more
Consider giving the Prefab API documentation a quick skim. It describes methods we won't cover in this tutorial — our current Hacker News script is getting a bit long for an embedded automation. Methods for prompting the user with quick confirmations or with full forms, to take a screenshot, etc.